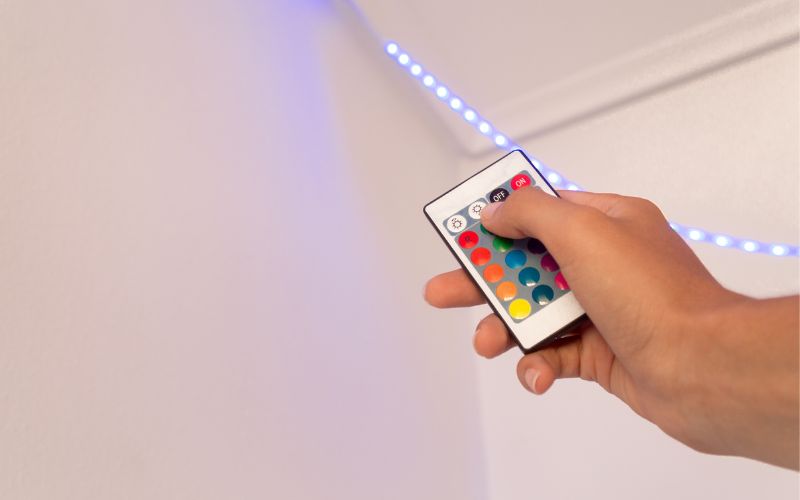
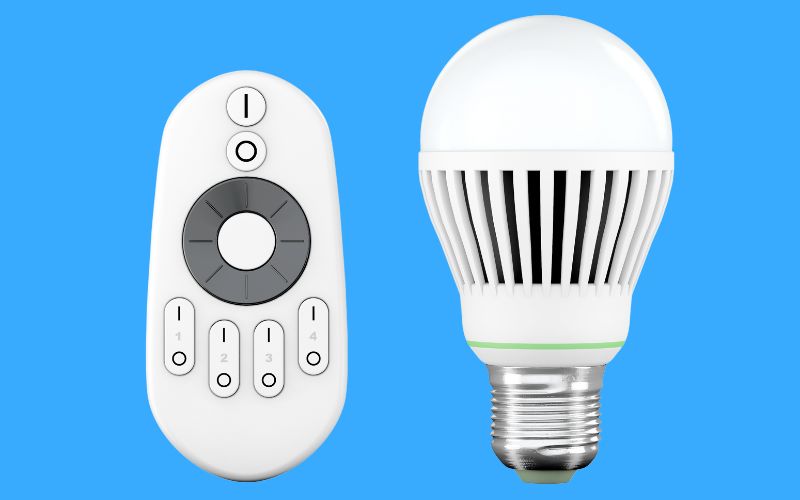
Many LED lights have the ability to be controlled by remote control, which is pretty handy.
Depending on the LED lights in question, you can turn them on and off, change the brightness, and maybe even change the color. RGB lights let you choose from millions of different colors from your phone, though remotes tend to have a few default options saved instead.
But if you have multiple LED lights, you don’t want to have lots of different remotes. It’d be better to control them all from one remote – that way you won’t get confused over which remote is for which light, and you can set the mood in the whole room easily.

Here’s a guide on you can sync LED strip lights to a single remote. Below that, is the guide for synching LED light bulbs to one remote…
How LED Strip Lights Work
Before we get into syncing LED strip lights, it’s important to explain how they work, as that plays a key part in understanding the steps involved in syncing a remote.
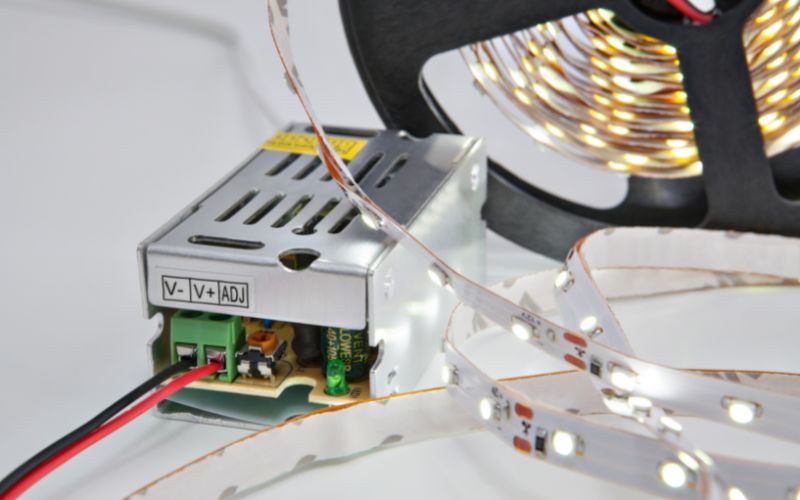
LED strip lights are never plugged directly into the mains. Instead, they are connected to a controller, sometimes called a driver.
Many LED strips are low voltage, meaning they don’t run on mains voltage but instead run on either 12 volts or 24 volts. Plugging them directly into the mains would completely fry them, and create a fire hazard.
So the job of the driver is to step the mains voltage down to a safe level.
That’s not the case for all LED strip lights – you can get high-voltage strips that run on mains power. But these aren’t as common.
The controller also does another job in allowing the user to control the lights. Rather than having to use the switch on the power outlet, the controller will often have buttons to press, and it will also usually allow a remote control to be used to manage the lights.
The controller is therefore a really important bit of tech – as if you want to know how to connect multiple LED strip lights to one remote, this is the key device that will let you.
Syncing LED Strip Lights Using Multiple Controllers
If you already have your LED strip lights installed and they each have their own controller, you can sync them to a single remote.
However, it may only work if the strip lights are made by the same manufacturer. Otherwise the remote may not be compatible with the various controllers. Most people tend to buy the same brand of LED strips, so this method will normally work for most people.
1. Make sure the LED strip lights are switched on
Not always necessary, but in most cases, you’ll need to have the LED strip lights switched on to be able to sync them. Remember though that you’re actually syncing to the controller, which will always be powered if the outlet is switched on.
2. On your remote, hold down the sync button
This button will vary, depending on your remote. It may be the power button, but sometimes the sync option is assigned to another button on your remote. It might be labeled ‘Sync’ or it could have a plus icon. Sometimes the sync function is assigned to a random button that does two jobs.
The only way to know which button you need to hold down is to check the manual that came with your LED strips. If you can’t find it, get in touch with the manufacturer, and they can tell you what button you need to use.
This method is useful if you want to keep things simple, provided your LED strip lights allow you to synchronize. Most do, but not every set can, so if you are planning on buying new LED strip lights to be synched together, you might want to research first to check that it’s possible.
The major downside is that, if you want to control all the lights at once, your remote needs to be in range of all the controllers. Otherwise, you might have to move around. Plus, once you’ve synched them you can’t unsync them, so you have to control all of the lights at once.
Syncing LED Strip Lights Using A Single Controller
It’s possible to buy controllers designed to control multiple sets of lights. This will involve you replacing the existing controllers with a single unit. Here are the steps you need to follow to do that…
1. Work out the amps required by your strip lights
This first step is a little tricky, but it’s really important. Because if you want to run all of your LED strip lights from a single controller, you need to make sure that the controller can handle the amperage.
To work out the amps, you need to know the watts used. A typical 16-foot light strip with white LEDs will use 24 watts, but you’ll need to check your chosen strips as this can vary, depending on the type of strip and the density of the LEDs.
You then work out the amps by dividing the watts by the voltage – and it has to be the voltage of the strip, not the mains power supply. So it’s likely to be 12V.
This means you can work out that the light strip will use 2 amps.
Do this for each strip you want to use, and add the total together to get the total amperage of your strip lights.
2. Buy a controller that can handle these lights
Once you’ve identified how many amps you’re using, you’ll need to find a single controller designed for multiple strips that can handle the amps needed.
Many controllers are only suitable for 6 amps, so using the example above, you can only connect three of these strips to it. That’s why it’s important to check first.
If you want to use a single controller, and you want more than 3 light strips to be attached, you’ll likely need to use strips that are shorter than 16 feet.
RF Wireless Remote Control LED Controller Kit

- Built-in 10 dynamic modes include jump or gradual change style
- 4096 levels 0-100% dimming smoothly without any flash
- Controller automatically transmits signals to another controller within 30m distance
3. Connect each strip light to the controller using the required connector
Typically, the connectors used for syncing multiple strips together use a 4-pin connector to attach the strips. Many light strips will already have these attached, but for bare strips, you can use a solderless connector to clamp onto the pins.
Strip Light 4-Pin Connector
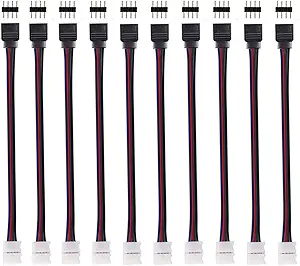
- 10pcs LED 5050 RGB strip light connector
- 10mm LED connector 4 pin
- Supports 0-4A current and 0-24V voltage input
Plug each connector for the strips into the controller, and then it should be ready to control. The controller will come with its own multi-zone remote, which will allow you to either control one strip (by pressing the numbered button corresponding to that strip), or all at once.
The downside to this method, beyond needing to buy a new controller, is that you’re relying on wiring all of your strip lights from that single controller. This either limits you on where you put the light strips, or it means you have to buy cable extenders to run from the controller to where you want the strips to live.
If your light strips will be spaced far apart, that’s a lot of extension wiring. It may be better to instead use separate controllers, rather than running cable all the way to the single controller.
Syncing Multiple LED Light Bulbs On One Remote
Most LED lights that you can manage using a remote control are strip lights. But you can sometimes buy light bulbs that come with a remote control.
These work in a similar way to strip lights, in that they use a controller device to communicate with the remote. However, that controller is tucked away inside the base of the bulb.
These bulbs tend to be cheap, and the options for controlling them remotely are limited. They are nowhere near as sophisticated as traditional smart lights which you control from your smartphone.
But that does give you a benefit – if you want to control multiple LED bulbs from a single remote, just buy the same bulbs and install them.
Even though they will all come with a separate remote, they will automatically work with just one of them. The bulbs aren’t clever enough to have unique signals – one remote will control them all.
LED Light Bulbs
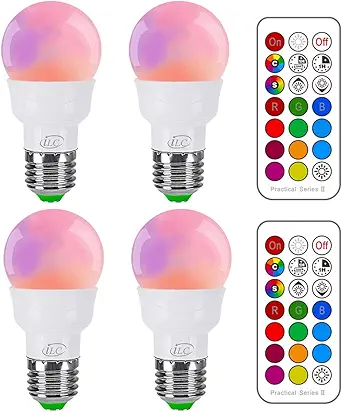
- Remote-controlled and colour-changing LED RGB light bulb
- 12 colors to choose from
- 3 levels of brightness to adjust
- Comes with 2-year-warranty
This could also be problematic if you only want to control one bulb at a time. If you want to have complete control over individual bulbs, then your best option is to buy smart bulbs.
They’re a lot more expensive, but you can control them from your smartphone and use that as a remote.
Philips Hue LED Smart Bulbs
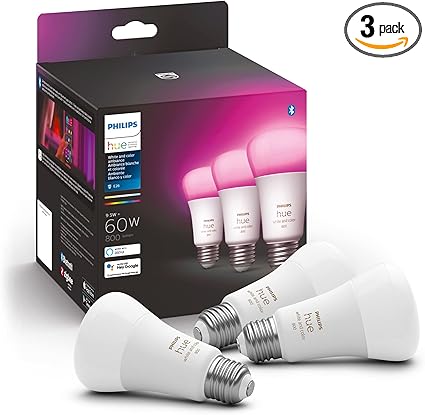
- Control your Philips Hue Smart Lights with your mobile device or voice assistant
- Lasts for 22 years or 25,000 lifetime hours
- Offers 50,000 shades of warm white light and cool daylight with instant wireless dimming
To Summarize
How you sync your LED lights depends on whether your lights are spaced far apart, or if they’re clustered together.
- For lights that are spread around your home, use the sync button on the remote (check your manual) to sync it with each individual controller
- For strip lights that are close together, buy a multi-strip controller with a multi-zone remote – you’ll have more control over your lights
If your budget stretches to smart lights, then definitely go for this option. Whether it’s strip lights or bulbs, the controls available through a smart app give you loads more options for your lights, including setting timers, choosing specific colors, and even creating your own custom lighting scenes.